
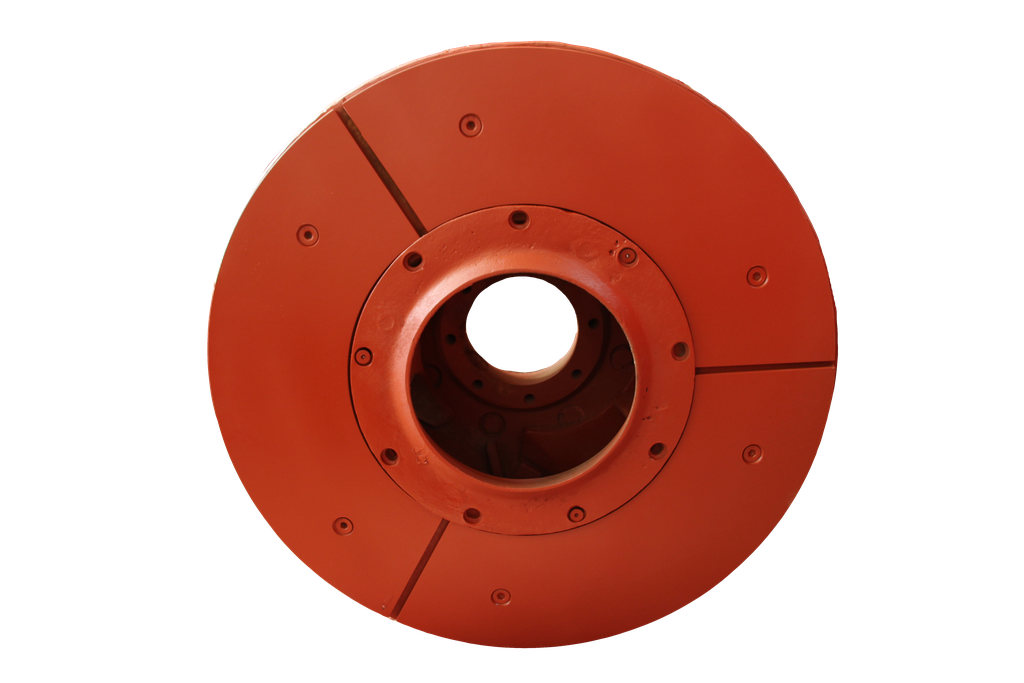
A VSI rotor is exposed to heavy abrasion from the material passing through it. The parts that protect the rotor body from this wear are the cavity wear plates, the upper and lower table liners and, in some designs, the rock shelf that forms inside the rotor. In enclosed rotors working on the rock-on-rock principle, the material forms its own autogenous lining inside the rotor; however, the plates that carry this rock bed and protect its edges still need regular inspection and replacement.
In this guide we cover the function of the rotor’s internal wear parts, wear signs, inspection and replacement steps, their relationship with balance and spare part selection. For general VSI operation, see our vertical shaft impactor guide.
Parts and Their Functions
| Part | Function |
|---|---|
| Upper table liner | Protects the inner face of the rotor’s upper plate |
| Lower table liner | Protects the rotor base (around the distributor plate) |
| Cavity wear plates | Protect the area around the ports and the edges of the rock shelf |
| Tip protectors | Protect the back of the rotor tips |
| Rock shelf | An autogenous lining formed from the material; protects the metal parts |
Autogenous Lining in Rock-on-Rock Rotors
In VSIs with enclosed rotors, material builds up in front of the ports inside the rotor and forms a “rock shelf”. Incoming material slides along this rock bed, which greatly reduces wear on the metal surfaces. For the rock shelf to form properly, the plates holding it must be sound, the inside of the rotor must not be clogged with excessively wet material, and the feed size must be suitable.
Wear and Failure Signs
- Thinning and breakage at the plate edges,
- Shiny wear marks on the rotor body,
- The rock shelf not forming properly or breaking up,
- One-sided wear inside the rotor,
- Increased vibration,
- Loose plate fixings.
Inspection and Maintenance
| Check | Interval | Method |
|---|---|---|
| Visual check inside the rotor | Daily / with tip checks | With the lid open |
| Plate thicknesses | Weekly | Measurement |
| Cleaning inside the rotor | At every stop (wet material) | Removing built-up material |
| Fixings | Weekly | Check for loosening |
Replacement Step by Step
- The crusher is stopped, the rotor is confirmed to have stopped and LOTO is applied.
- The lid and feed tube are removed.
- The inside of the rotor is cleaned; the built-up rock shelf is removed if necessary.
- The worn plates are removed; the seats are cleaned.
- New plates are fitted equally in opposite positions and secured.
- The rotor tips and protectors are checked at the same time (see rotor tips).
- The feed tube is centred, the lid closed and vibration checked.
Common Mistakes
- Running plates until the rotor body wears,
- Not replacing plates in opposite positions (balance),
- Running without cleaning build-up from inside the rotor,
- Using unsuitable fixings.
Troubleshooting Table
| Symptom | Possible cause | Solution |
|---|---|---|
| Rotor body wearing | Plates replaced too late | Increase inspection frequency |
| Vibration | Uneven wear, build-up | Cleaning, replacement in opposite pairs |
| Rock shelf not forming | Worn plates, unsuitable feed | Renew the plates, check the feed |
| Plate falling off | Loose fixing | Renew the fixing |
An Example from the Field
On a VSI processing wet limestone, vibration alarms were more frequent in the mornings. It was found that wet material built up inside the rotor during the overnight shutdown hardened on one side and upset the balance. Emptying the rotor before shutdown and checking inside the rotor before the morning start were added to the procedure; a worn cavity plate was also renewed. The problem disappeared.
Pre-Purchase Checklist
- Have the VSI make/model and rotor type been identified?
- Have the types and numbers of plates to be replaced been determined?
- Are fixings included in the order?
Frequently Asked Questions
How often are cavity plates replaced?
Less often than the tips; however, a weekly check is recommended with abrasive material.
Does a rock shelf form in every VSI?
It forms in enclosed-rotor, rock-on-rock designs; open-rotor designs use metal surfaces.
Can plates be replaced one at a time?
For balance, it is recommended to replace opposite positions together.
Wear Parts by Rotor Type
| Rotor type | Main wear parts | Wear character |
|---|---|---|
| Enclosed rotor (with rock shelf) | Upper/lower table liners, cavity wear plates, tip protectors, rotor tips | The rock shelf protects metal surfaces; wear concentrates at the tips |
| Open rotor / table type | Table plates, shoes, distributor | Metal surfaces are in direct contact with material; wear is higher |
| Multi-port rotors | Tip, protector and plate sets for each port | Feed alignment is critical for even wear between ports |
Effect of Operating Conditions on Plate Life
| Condition | Effect | Recommendation |
|---|---|---|
| High rotor speed | Plate and tip wear accelerates | The lowest speed that achieves the target product |
| Oversized feed | Rock shelf does not form properly, impact increases | Feed size suited to the rotor type |
| Wet, clayey material | Build-up hardening inside the rotor, imbalance | Pre-screening, emptying the rotor before stopping |
| Off-centre feed tube | Uneven wear of the ports | Alignment checks |
| Abrasive rock | Plates wear out quickly | More durable material, frequent checks |
Material Options
- High chrome cast iron: Standard for most cavity wear plates; high wear resistance.
- Tungsten carbide reinforced plates: Considerably extend life in critical areas with very abrasive materials.
- Wear steel: An economical solution in less critical areas.
Maintenance Record Form
| Field | Record |
|---|---|
| Date, operating hours, tonnage | Values at the time of replacement |
| Plates replaced | Position and quantity |
| Measured thicknesses | Remaining thickness before replacement |
| Rock shelf condition | Even / uneven / absent |
| Vibration value | Before and after replacement |
| Rotor speed | Speed and cascade setting |
OEM or Aftermarket?
Dimensional fit and weight balance are critical for rotor cavity plates. When choosing aftermarket parts, verify that the plates seat in the rotor seats without gaps, that the fixing holes are in the right position, that opposite plates have equal weights and that the material hardness is documented. A plate that does not fit can leave gaps inside the rotor, causing wear of the body and balance problems.
Stock and Supply Planning
- Keep at least one full set in stock of the plates that are replaced together with the rotor tips.
- For table liners, which are replaced less often, plan order timing by tracking their life.
- Fixings (bolts, wedges, pins) are renewed at every replacement, so keep enough of them.
The First Hours After Installation
- During an idle run, compare the vibration value with the value before replacement.
- After the first few hours, open the rotor and check the fixings and rock shelf formation.
- Confirm sand yield and particle shape with a product sample.
More Questions
What should be done if the rotor body is worn?
Slight wear can be repaired with a suitable welding procedure; serious wear requires a workshop overhaul or replacement of the rotor. A balance check after repair is essential.
Why does the rock shelf sometimes not form?
Worn plates, an unsuitable feed size, excessively wet material or build-up inside the rotor can prevent the rock shelf forming properly.
Are rotor cavity plates and rotor tips replaced at the same time?
The tips are usually replaced more often; the plates are checked at every tip change, and those that have reached their limit are replaced in the same shutdown.
Spare Parts and Service for Rotor Cavity Plates
CSP Mühendislik supplies rotor cavity wear plates, table liners and fixings for vertical shaft impactors as part of its VSI crusher spare parts range, and provides service support for rotor overhauls. Send your VSI model on WhatsApp.


